But Kelly, how much do you REALLY edit an image?
Jul 10, 2019
There’s a question that comes up in almost every session I do and it goes something along the lines of, “So, how much do you really edit? Can you take this out or that out?”
The thing is….
There’s no straight answer to this question.
Sometimes I edit an image heavily and it takes working in both Photoshop and Lightroom and can take up to half an hour to work on and then sometimes all it takes is a few quick clicks.
Can I make you lose 10 pounds? That answer is no (because it’s my job to make you feel like you look amazing without losing anything!). I do not airbrush bodies or use tools to ‘shrink’ you. What I will do is smooth out uneven skin tone (especially newborn acne), fix any lines that are showing under clothing that aren’t flattering (i.e bra lines), and clone out any blemishes or bruises.
If it’s distracting in an in-home image, I’ll often remove light switches, plugs and floor registers. Also, I tend to have to remove my toes from quite a few images, especially when I shoot overhead. 🙂
I do use a custom made editing preset that gets applied to all of my images (I have one for colour and for black and white) so that all of my images feel consistent in terms of colour, tone and contrast. These presets are ones that I’ve developed over the years and are exclusive to my work.
How about a few examples?
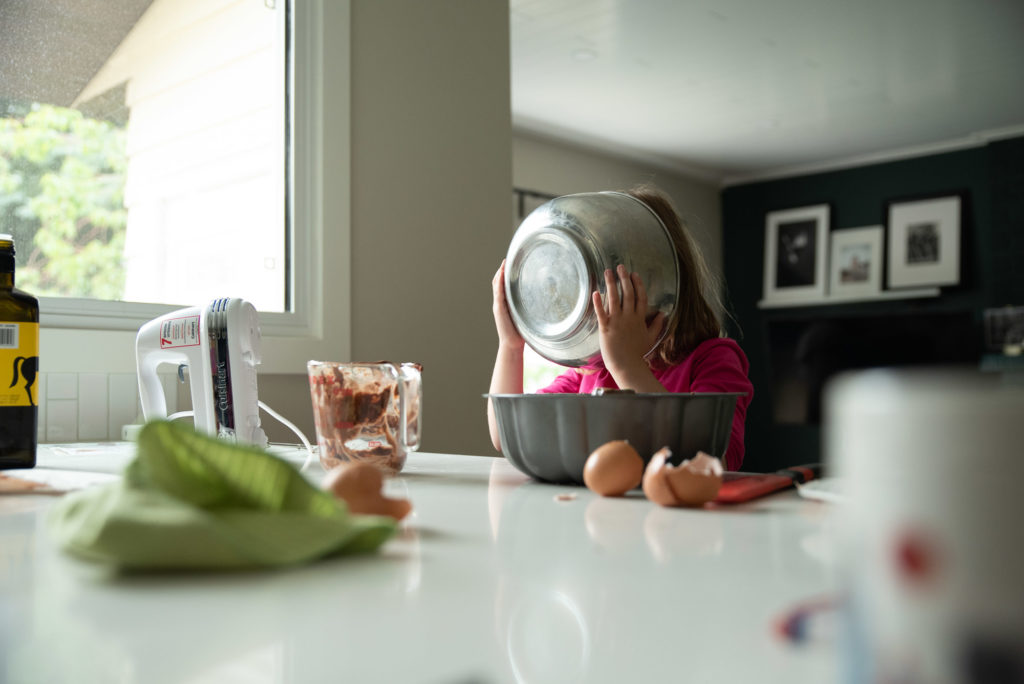
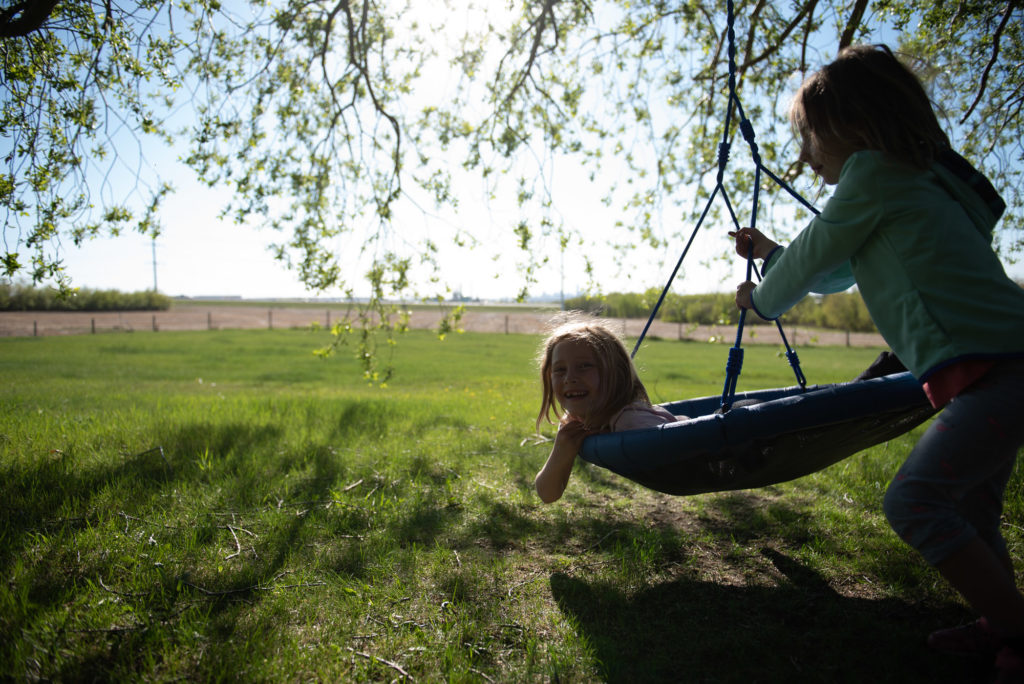
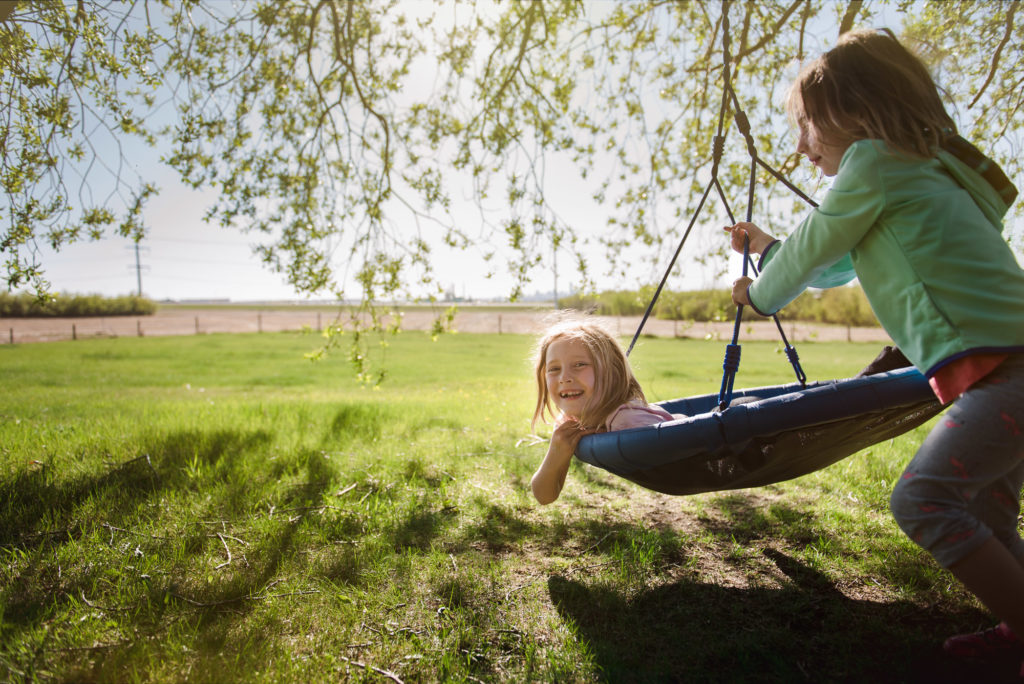
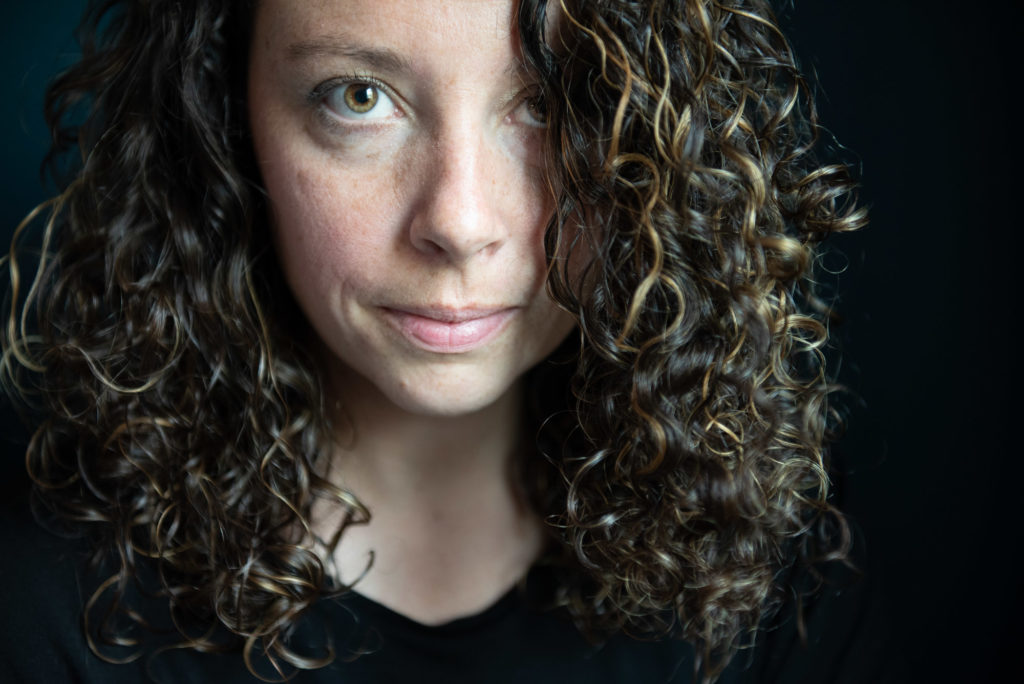
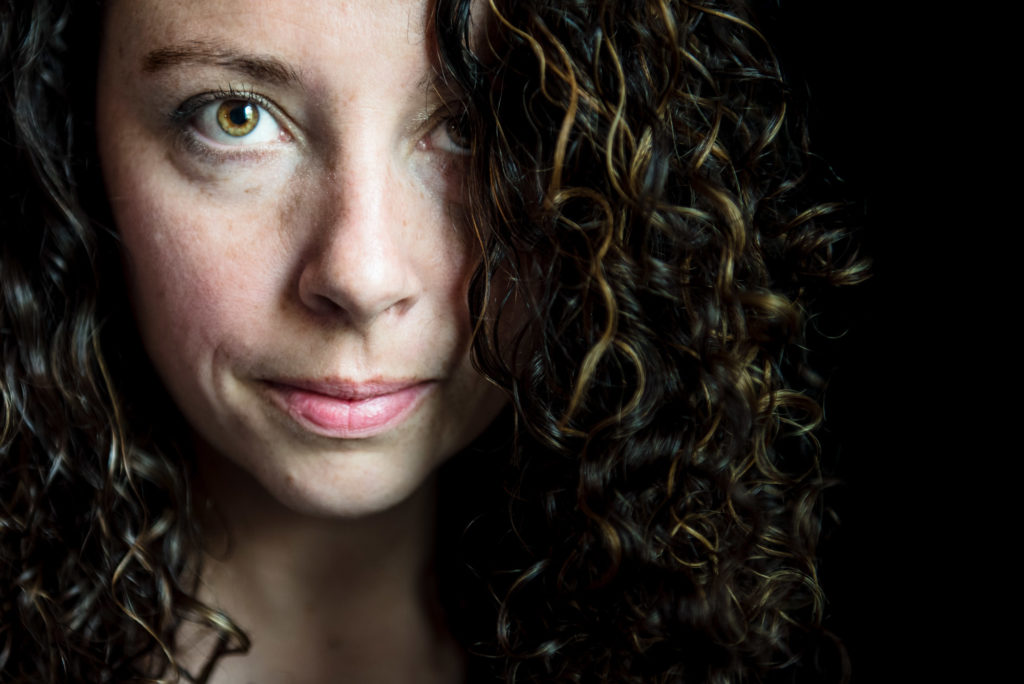
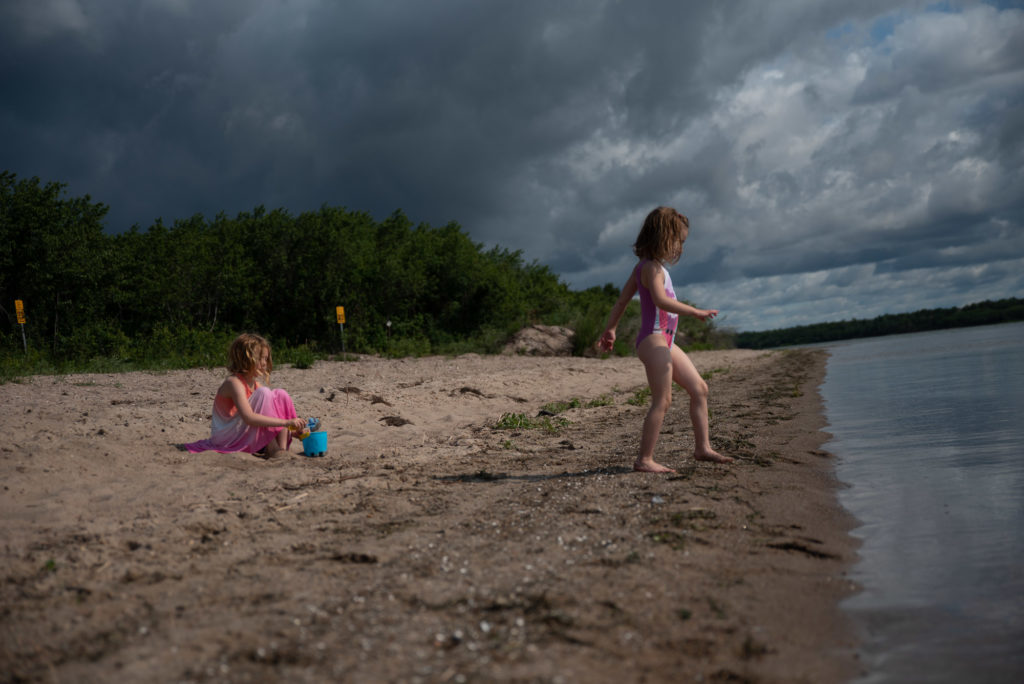
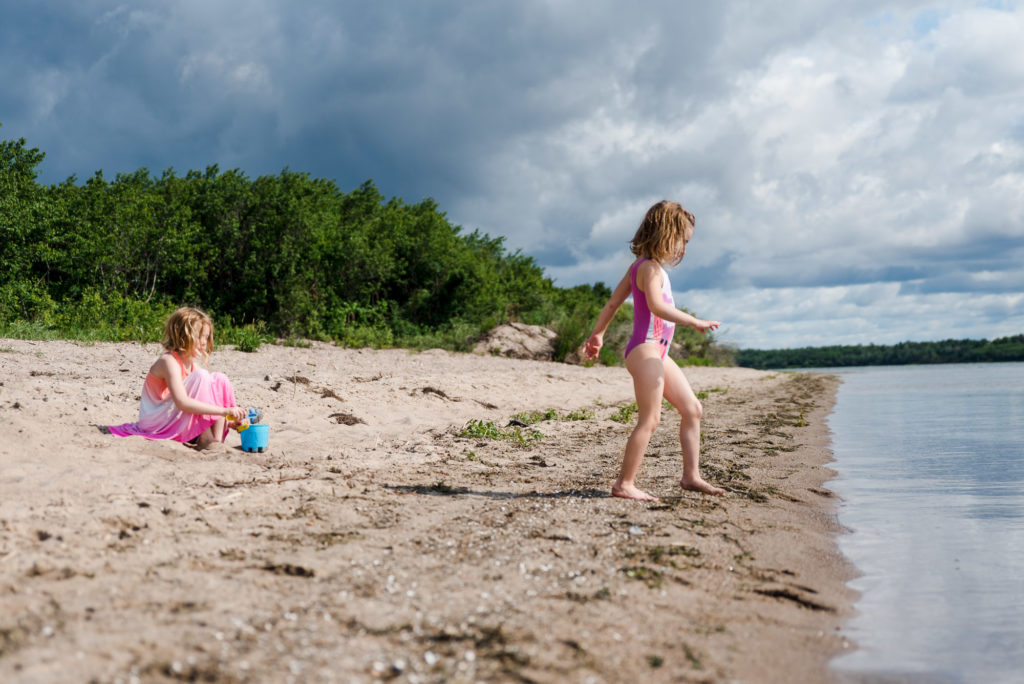
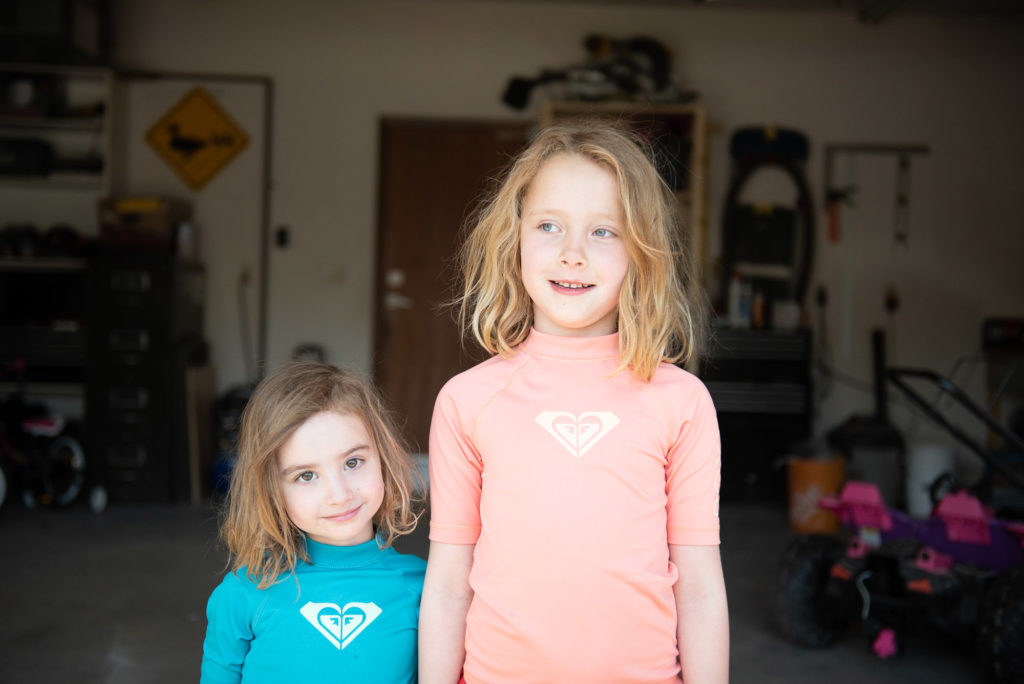
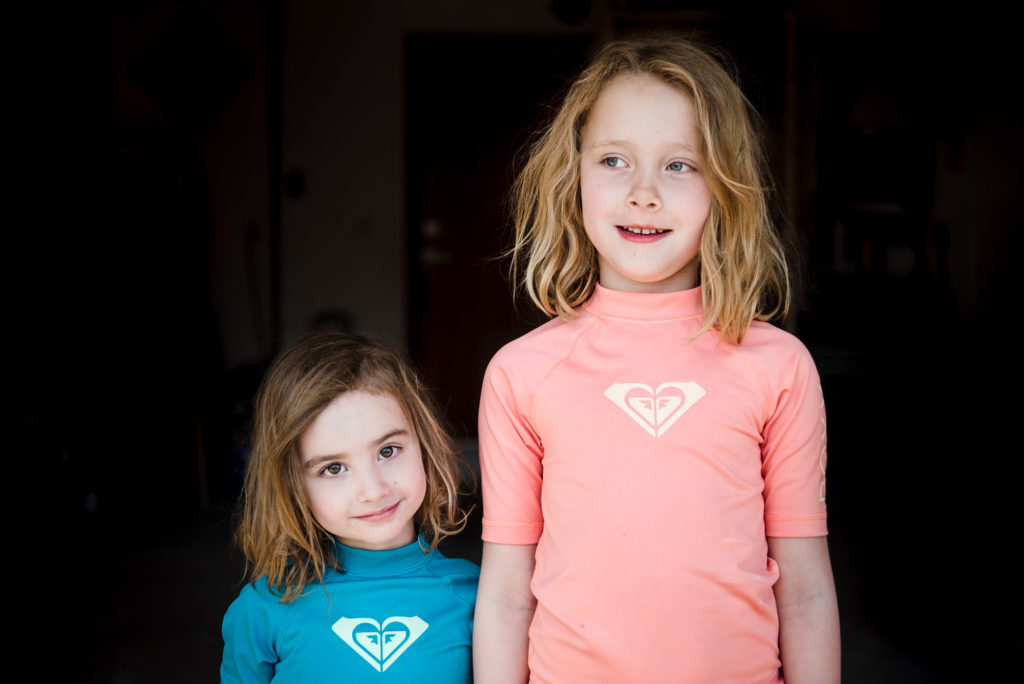
All of the examples below show the straight of camera image (no editing at all) on the left and the fully edited image on the right.
This is pretty classic example of an easy edit. It brightened it up, fixed the colour up a bit and cropped it in on the left to remove that bottle that was only half in the frame.
When I’m shooting outside in bright sun I’ll often under-expose people so that I can save the detail in the sky. Then I’ll brighten the shadows up during editing. In this image, I also added a sun-flare overlay to help enhance the sun.
It’s often tricky to get composition exactly right with self portraits, so they generally require more cropping and re-positioning while editing. I also smoothed my skin slightly, brightened my eyes and darkened my lips and lashes. This is the same type of treatment I’d do on your face if you were to be in front of my lens for a look-at-the-camera portrait.
I straightened, brightened everything up and I removed 2 little yellow signs in the trees that I found distracting.
I knew going into this one that I was going to darken the background behind them, so I exposed for their skin and then enhanced shadows while editing and darkened things up. I also had to clone out a few things (such as the yellow diamond sign) that were still too distracting after the shadows were dark.
So, there you have it!
When you have a session with me, you’ll only see the fully edited and re-tocuhed images in your gallery so that everything looks its very best when you see it. Although I haven’t shared any black and white examples here (that’s a whole other topic!), all of my galleries are mixes of colour and black and white images and I edit each image with consideration of if it will look better in colour or black and white.
Questions? Send me an email and I’ll reply!
POSTED IN:
Leave a Reply Cancel reply
© 2012-2025 fiddle leaf photography 2020
home
about
blog
INFO
CONNECT
FAMILY, SCHOOL and
ATHLETIC photographer based in Edmonton, AB.
780-709-4204
reviews
THE NEWSLETTER
GALLERIES
athletics
SCHOOLS
contact
Stay up to date with our latest offerings and galleries.
JOIN NOW
hello@fiddle-leaf.com
IG: @FIDDLELEAFPHOTO

be the first to comment